*
FRAUD WARNING:
Update January, 2026: Please do not send any money to anyone (email transfer or any other form) asking for a deposit for work done by Fred. Someone is claiming that he/she is representing Fred Zavadil Wood Carving and asks for a deposit for work done by our company.
WE ARE NOT ACCEPTING ANY WORK DUE TO THIS ISSUE AT THIS TIME.
RCMP HAS ALREADY BEEN NOTIFIED BY SEVERAL CLIENTS.
December, 2025. If you receive a request for carving, engraving, CNC copying or any other work under the name of Fred Zavadil or Fred Zavadil Wood Carving and Sculpting, please ignore it. Someone is using our credentials for scams and money laundering.
How to prepare basswood wood carving for painting and staining
*
If you would like to watch a video of me preparing wood carving for staining and finishing, please scroll to the bottom of this page.
.
Most of the questions I get on regular basis are about how I prepare my basswood wood carvings for painting, staining, and finishing and about stains and paints used. A lot of us struggle with this part and we all know that bad stain or paint can ruin the best carving.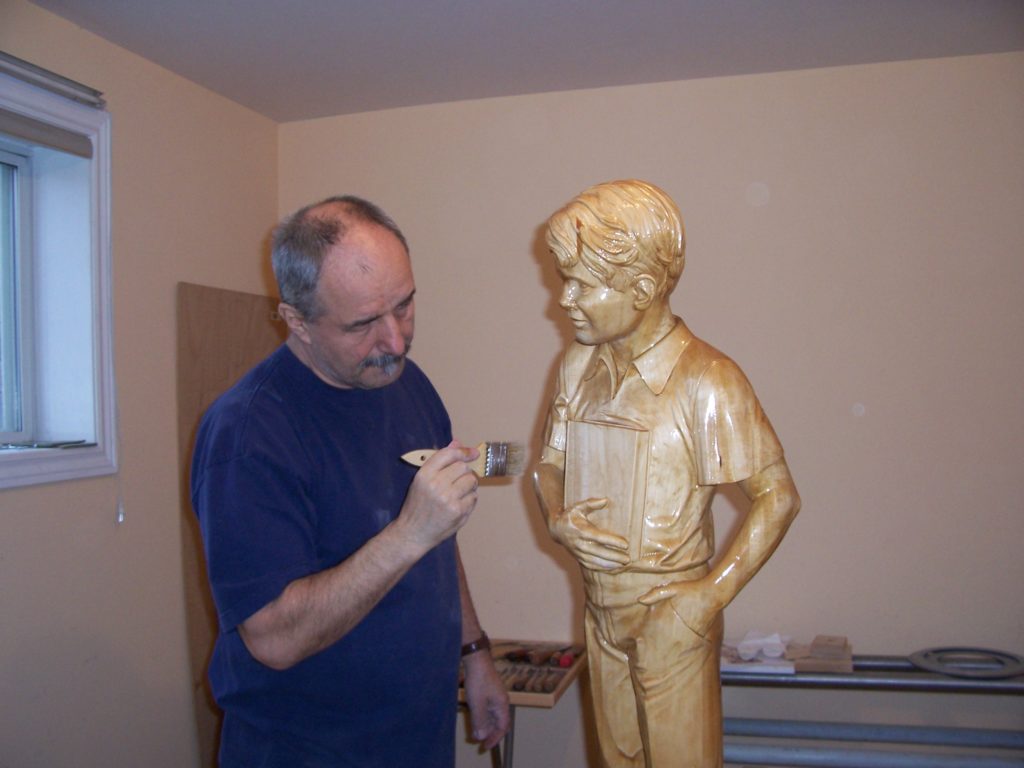 From my experience, it is really not the ‘bad stain or paint’. In most cases the damage is caused by non existing or inadequate wood preparation before painting / staining.
Please, keep in mind that I work primarily with basswood (linden wood) – you might get different results with different woods. Also, I mix my ‘stains’ from oil paints (for artists) and only use oil paints (for artists) when painting wood sculptures.
If you buy your stain in a store, you should follow instructions on how to use it because my method will not get you the same results.
The major point: I seal the wood before I use stain or paint = my stains and paints DO NOT PENETRATE wood.
Please keep in mind that none of the following is ‘written in stone’ because I am not exact on ratios when mixing – you can see it in the video at the end of this page.

1. I mix varnish (polyurethane) with paint thinner 3:2. ( 60% of varnish and 40% of paint thinner)
2. I apply mixture on the carving – as much as the wood absorbs (a lot! – the more the better)
3. I let it dry about 24 hours or until dry
4. I use steel wool to clean all the little fuzzy stuff on my carving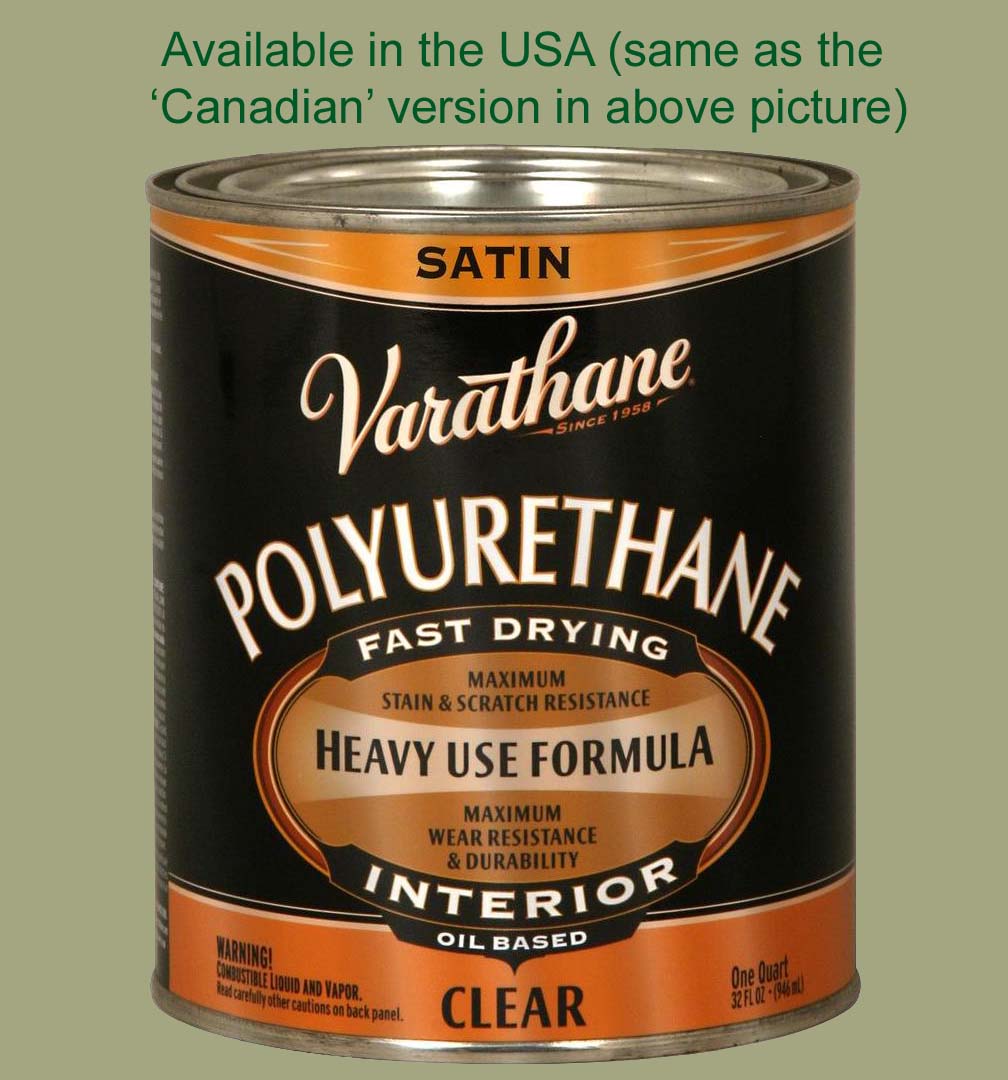
5. I mix varnish (polyurethane) with paint thinner 4:1. (80% of varnish and 20% of paint thinner)
6. Apply mixture on carving
7. Let dry another 24 hours or until dry
8. I Apply stain / paint – please keep in mind that I mix my own stains!!! Stains bought in store will not work the same way, you should follow instructions provided by manufacturer.
When I apply all these mixtures, I am basically sealing the wood. It means that when I later stain or paint the carving (point 8.), the wood does not suck the paint/stain in. The stain stays on the surface of wood and is much easier to manipulate. Oil based stains dry much longer – they give me more time to work with. I use a piece of cloth or paper towels to wipe off excessive stain/paint before it dries.
I personally do not like painting my carvings but there are circumstances when hint of paint will enhance the carving or when clients insist on having their carvings painted. In those cases, I use oil paints for artists. I usually use only very light coat of the paint and try to make sure that the wood is visible under the paint.
No matter what paint you use, always start with light colors!!!!
*
Stains are normally used on unsealed wood. When you use stains on wood without sealing the wood, the stains WILL PENETRATE the wood. If you do not like the color and want to change it to a LIGHTER tone, you will have to send or re-carve your project to get rid of the dark stain and then re-apply a different stain. My best advice is – before you apply any stain on your carving, use a piece of the wood you used for your project, make few cuts in it, apply the stain and let it dry! It should give you and idea how it will look.
Watch video: How to prepare basswood wood carving for painting, staining, and finishing
*
© Copyright Fred Zavadil, 2005-2022. Text, art work, and images on this website are protected by copyright. Any reproduction, re-transmission, e-mailing or resale of images or website content is STRICTLY PROHIBITED without owner’s prior written consent.